Correct Installation Steps of Detachable Sissy Bar Backrest, Applied to Models in Harley-Davidson
weisenweisen
Do you know Mofun “Detachable Sissy Bar”?
Mofun detachable backrest is a convenient installation backrest that permits installing or removing it in minutes. Only need to assemble the backrest accessories, insert them in the correct position on the docking points, and align and lock the backrest with the docking.
Everything must be fixed to the corresponding position and then tightened with screws. Otherwise, it is easy to deviate from the position of the two sides resulting in the inability to install.
Detachable backrest is installed to add versatility and make riding more comfortable and pleasant. Avoiding the troubles caused by complex installation.
How to install the detachable backrest correctly?
The following is the correct installation steps:
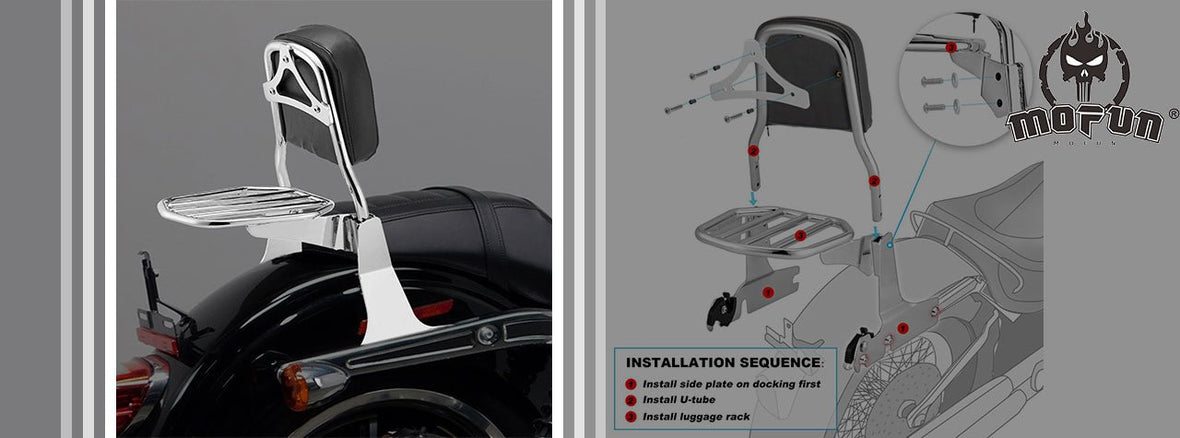
The detachable backrest is composed of six parts: backrest pad, a pair of sissy bar side plates with latching system, U-tube, triangle plate and mounting bolts.
Step1: Place the two sissy bar side plates on the front docking point, and slowly rotate the sissy bar side plates to dock with the rear docking point. Gently push the sissy bar side plates down and lock them on the docking points.
*Pro Tip*: It is recommended to install and fix the side plates first. If the U-tube and side plates are assembled first, the installation position of the backrest will be difficult to adjust, which will bring difficulties to the subsequent installation.
Step2: Align the mounting hole of the U-tube with the mounting hole on the Sissy bar side plates, and fix it on the inside with the mounting bolts.
Step3: Place the backrest pad in front of the U-tube, and use the triangle plate to fix the pad and the U-tube.

Note: The three ends of the plate should be closed to the U-tube.
The position of the screw hole on the triangle plate should be aligned with the hole on the pad. After adjusting the position, use the mounting bolts to tighten and fix it. The installation is completed.